FabFilter Saturn 2 online help
Table of contents
Go to sectionFabFilter Saturn 2 Help
Introduction
Using FabFilter Saturn 2
Interactive multi-band display
Drag-and-drop modulation slots
Full Screen mode, resizing and scaling
Presets
Purchasing FabFilter Saturn 2
Support
Interactive multi-band display
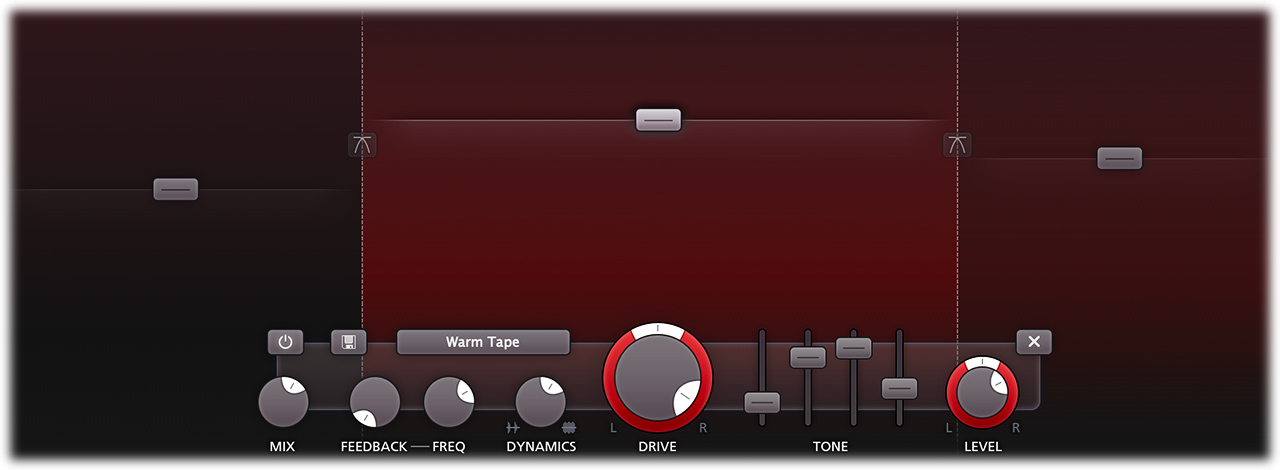
FabFilter Saturn 2's top section consists of a large interactive multi-band display, which makes it very easy to create and select frequency bands and adjust their level and drive settings. At the same time, it's also a real-time frequency analyzer.
-
To add a new frequency band, simply click on the small '+' button that appears at the top of the display when you move the mouse here. By clicking this button, the current frequency band splits with a crossover frequency at the current mouse position. The new band will copy its settings from the band that has just been split.
- Simply click anywhere in a band to select it.
- Click and drag on the display background to select adjacent bands by dragging a rectangle around them.
If only one band is active, it will be selected by default and the band controls control the settings of this single band. Once you have multiple frequency bands available, the display highlights the level buttons of the selected bands and the band controls are linked to these bands. In the screen shot above, the middle band is selected. In addition, the band controls will slide underneath the selected band.
- Click and drag a selected level button vertically to adjust the level setting of all selected bands. If you have multiple bands selected, the level of all selected bands will be adjusted with the same relative change. Alternatively, simply use the mouse wheel while hovering anywhere above one of the selected band. You can also double-click the level button to type the level value directly.
- Ctrl-click (Windows) or Cmd-click (macOS) to reset the band level.
- Hold the Alt key to adjust the drive setting of the selected bands instead, while applying one of the above changes via dragging, mouse wheel or click.
- Hold the Shift key (Ctrl in Pro Tools) to fine-tune band levels or drive while applying changes via dragging or using the mouse wheel.
- To change a crossover frequency, click and drag the vertical crossover split. Alternatively, click and drag a level button horizontally to change the crossover frequencies at both edges of the band. Double-click a crossover split to type a frequency value directly.
- Via the crossover slope button in the middle of a crossover split, you can choose the steepness of crossover filtering, ranging from a gentle 6 dB/oct to a very steep 48 dB/oct.
Tip: About everything in the display can be modulated, even the cross-over splits. Simply drag and drop a modulation source to it!
Solo and mute
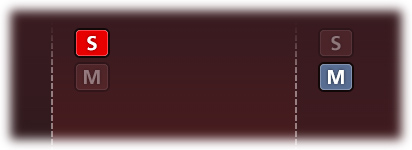
If you hover the mouse over the top of the display and there is more than one band, small solo and mute buttons in the left-top corner of each band will appear. The solo button lets you listen to a single band, while the mute button does the opposite and mutes the band, letting you hear all other bands. Of course, you can solo or mute multiple bands at the same time, just like with tracks in your DAW.
- Hold down the solo or mute button to solo or mute a band only temporarily, as long as the mouse button is pressed.
- To solo or mute a band exclusively, Ctrl-click (Windows) or Cmd-click (Mac) the solo or mute button.
Solo and mute changes can be automated and are saved with the other parameters, so you can also use them for creative effects.
Next: Band controls
See Also
Overview