FabFilter Timeless 3 online help

Table of contents

Delay display

The left top part of the interface contains the delay display, which visualizes the current delay, feedback and mix settings of the plug-in, and lets you change these settings as well.

Filters

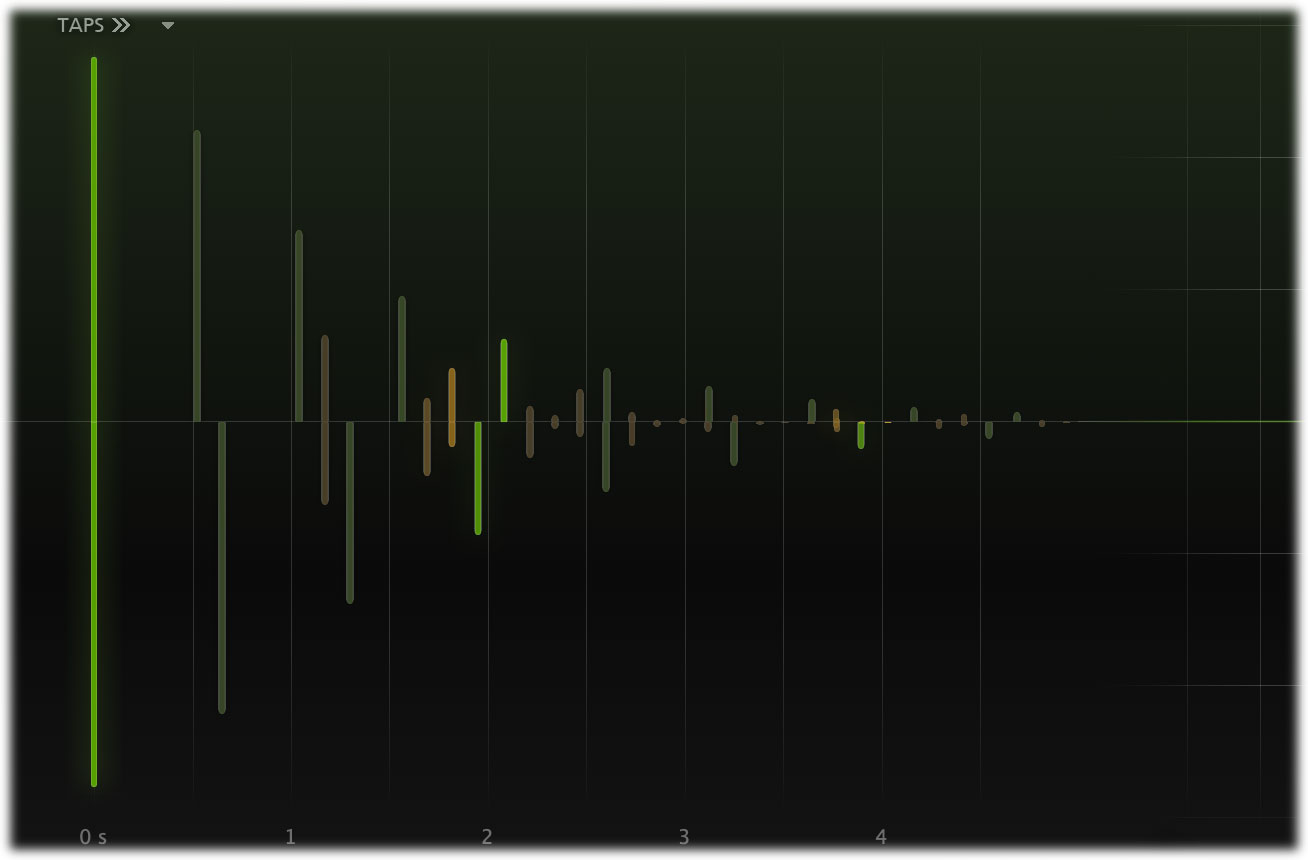
The leftmost bar represents the dry input, and it will light up when the plug-in processes audio. The next bars represent the delayed audio and the feedback repeats, in both the left (upper part) and right (lower part) channels, which will also light up in time.

When lowering the stereo width, you will see the bars moving to the center if the display, visualizing the fact that the delay will be audible in both channels.

Hover above the display and click and drag a bar horizontally to change the current delay time and vertically to change the feedback amount.

Tap Edit mode

Click the TAPS button at the left top of the interface to switch to Tap Edit mode and back. Now, the leftmost bar still represents the plug-in's dry input, but the rightmost bar is the delay's main output tap; so the Tap Edit display scale ranges from 0% to 100% of the main delay time.

Now, you can add up to 15 additional delay taps which will be mixed with the plug-in's wet output. For every tap, you can set the delay time factor (i.e. a factor of the delay time at which the internal delay buffer is tapped), the output level and panning.

Using the tap menu button next to the TAPS button, you can load and save your own tap patterns, or apply various actions to all taps, like organizing them in a ramp, or randomizing the taps.

Filters

Creating taps

While in Tap Edit mode, you can add taps in various ways:

  • Double-click anywhere in the delay display. If you hold the mouse down after the second click, you can drag the tap right away to change the level and the time factor.
  • Move the mouse to the top of the display and click the floating + button to add a tap at that position, with its level initialized at 0 dB.
  • Right-click anywhere in the display and click Add Tap in the pop-up menu that appears.

Selecting taps

When you have created some delay taps, you can select them in the following ways:

  • Click any of the taps to select it.
  • Click and drag on the display background to select adjacent taps by dragging a rectangle around them.
  • Hold down Ctrl (Cmd on macOS) and click another tap to select multiple taps. Hold down Shift and click a tap to select a consecutive range of taps.
  • Deselect all taps by clicking anywhere on the display background

Adjusting and editing taps

Once you have selected one or more taps in the display, you can simply drag them around to change their time factor and level. But there are more options:

  • When you hover over a tap, a parameter value display appears at the bottom, with controls to bypass or delete the selected taps. Double-click a tap in the display to enter a level value directly. You can also double-click on the level, time factor or panning lines in the parameter value display itself to edit them. When editing, use the Tab key to step through the different tap parameter values.
  • Ctrl+drag (Cmd+click on macOS) horizontally on a tap to change the panning of all selected taps.
  • If you right-click on the display background, a pop-up menu appears with various options, which will affect all taps in the display. You can create random patterns, reset panning, delete all taps, space them evenly, or ramp them up or down.
  • If you right-click on a tap, the pop-up menu offers options to reset panning, enable/disable or delete the selected taps.

Tips

  • You can also set the level and panning of the main tap at the far right, or disable it.
  • All of the tap parameters can be modulated as well. Simply drag a modulation source to a tap to modulate its level, or drag it to one of the values in the parameter value display to modulate the time factor or panning.


Next: Filters

See Also
Delay controls
Overview

Table of contents