FabFilter Pro-R 2 online help
Table of contents
Go to sectionFabFilter Pro-R 2 Help
Introduction
Using FabFilter Pro-R 2
Full Screen mode, resizing and scaling
Presets
Purchasing FabFilter Pro-R 2
Support
Post EQ
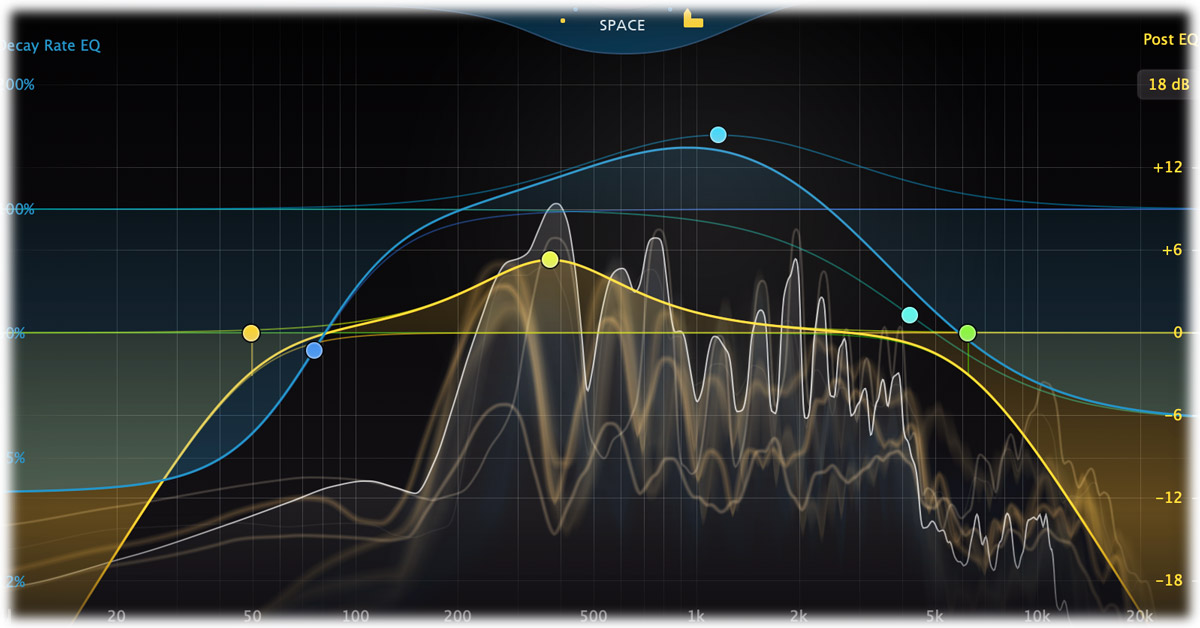
Another key feature for shaping the reverb sound is the integrated Post EQ in FabFilter Pro-R 2. Using up to six EQ bands, you can freely equalize the final reverb sound. The reverb gain is automatically adjusted to compensate for EQ changes, so you don't have to manually adjust the Mix setting or the send level while tweaking the reverb sound.
Creating Post EQ bands
- To add a new Post EQ band, simply click on the yellow Post EQ curve and drag it up or down. Dragging at the far left or far right of the display will automatically create a shelf instead of a bell filter. You can create up to 6 different bands.
- Alternatively, double-click or Ctrl-click (Command-click on macOS) the display background. Double-clicking at the far left or far right of the display will automatically create a low-cut or high-cut filter instead of a bell filter.
Note that the yellow Post EQ scale at the right side of the display lights up when you are working with Post EQ bands, to separate them from the Decay Rate EQ bands. You can change the scale of the display with the display range button at the top of the Post EQ scale, choosing between a range of +/- 30 dB, 18 dB or 9 dB.
Selecting bands
- Click the Post EQ band's dot or the colored area around it to select it.
- Click and drag in the display background to select adjacent bands by dragging a rectangle around them. Note: this selects both Post EQ and Decay Rate EQ bands.
- Hold down Ctrl (Command on macOS) and click another dot to select multiple bands. Hold down Shift and click a dot to select a consecutive range of bands.
- Deselect all bands by clicking anywhere on on the display background.
Adjusting and editing bands
Once you have one or more bands selected, the display highlights the shapes of the selected bands. You can now adjust them all at the same time by dragging.
- Click and drag a selected dot to adjust the frequency and gain of all selected bands. If you have multiple Post EQ EQ bands selected, the gain of all selected bands will be scaled relative to each other.
- Use the mouse wheel to adjust the Q setting of the selected bands, making them narrower or wider. This works while dragging or when the mouse pointer is above a curve. Alternatively, hold down Ctrl (Command on macOS) while dragging vertically to adjust the Q of all selected bands.
- Hold down Shift while dragging to fine-tune the settings of the selected bands.
- Hold down Alt while dragging to constrain to horizontal adjustments (frequency) or vertical adjustments (gain or Q, depending on the Ctrl/Command key).
- Hold down Alt and click the dot on an EQ band once to toggle its bypass state (enabling or disabling the band).
- Hold down Ctrl+Alt (Command+Alt on macOS) and click the dot on a Post EQ EQ band once to change its shape.
- Hold down Alt+Shift and click the dot on an EQ band once to change its slope (only for Low/High Cut filters).
- Double-click a dot to enter values in the parameter value display (using the Tab key to step through Frequency, Gain and Q) or double-click the values in the parameter value display directly. Note that you can enter frequencies in various ways, like "100", "2k", "A4" or "C#2+13".
- If you right-click on the dot for an band, a pop-up menu appears with various band settings. This is a quick way to modify the band while you're working in the display.
Using the parameter value display
When you move the mouse near a band in the display, a parameter value display appears that provides access to all band parameters.
- Click the Enable button in the left-top corner to bypass and re-enable the band.
- Click the Shape button in the left-bottom corner to change the shape of the band: Bell, Low Shelf, High Shelf, Low Cut or High Cut.
- Click the Stereo Placement button to control which channels are affected by the selected bands. By default, bands affect all channels, but you can also choose to process only left, right, mid or side information. For multi-channel instances, this button changes into a combined Speakers/Stereo Placement button and also lets you choose which speakers are affected by the selected bands. See Surround and Dolby Atmos for more info.
- Click the X button in the right-top corner to delete the band.
- Double-click any of the values in the display to enter the value directly, using the Tab key to move from one value to the next.
The display is attached to the band near the mouse cursor. If this band is selected, the actions you take in the display are applied to all selected bands. For example, to delete all bands, simply select them all and then click the X button in the parameter value display for one of them.
Next: Surround and Dolby Atmos
See Also
Using FabFilter Pro-R 2
Decay Rate EQ