FabFilter Pro-Q 4 online help
Table of contents
Go to sectionFabFilter Pro-Q 4 Help
Introduction
Using FabFilter Pro-Q 4
Full Screen mode, resizing and scaling
Presets
Purchasing FabFilter Pro-Q 4
Support
Solo
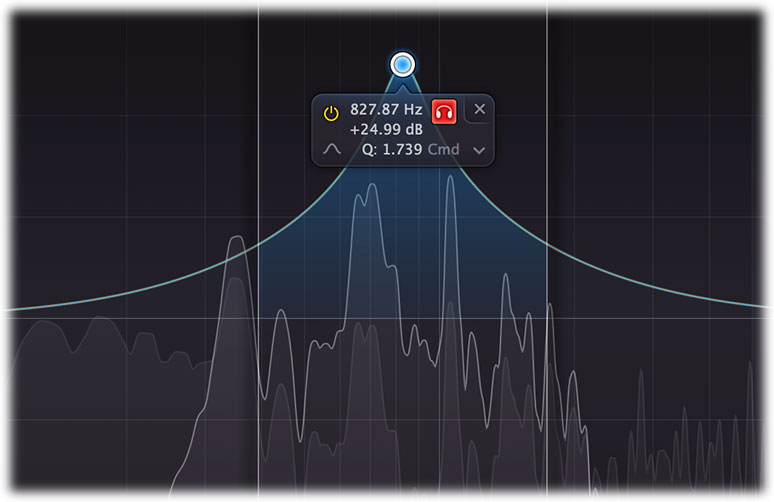
When you move the mouse cursor near an EQ band in the display, the EQ parameter display pops up showing the current parameter values for the band.
Click and hold the solo button (with the headphones icon) to enter solo mode for the current EQ band. The other EQ bands will dim, just like the yellow overall curve. Simply drag the solo button horizontally to change the frequency of the band, or vertically to adjust the solo listening level.
In solo mode, you don't hear the effect of the EQ band itself, but instead you will hear the part of the frequency spectrum that is being affected by that band. Of course, the frequency range depends on the frequency and Q settings, and is visualized in the display as well.
When using solo mode with Low Cut or High Cut bands, you will hear the frequencies that are being cut away instead of the frequencies that pass, which helps you to determine whether you are cutting the right frequencies.
Generally, solo mode aims to expose the parts of the incoming audio that matter to the current EQ band, but that you can't hear just by listening to the regular EQ sound.
Tips
- When using solo with Bell or Shelving bands, hold down Ctrl (Cmd on macOS) while dragging to change the Q, which will of course affect the frequency range that you hear. For filter types that do not have a Gain setting (Low- and High Cut, Notch, Band Pass), dragging in solo mode has the same effect as dragging the normal, changing both Frequency and Q.
- You can adjust the solo listening level by moving the mouse up or down while holding the solo button.
- If the piano display is enabled, the parameter value display will also show the note number that corresponds to the band frequency.
- You can turn the parameter value display on and off by clicking Show EQ Parameter Display in the Help menu.
Next: Full Screen mode, resizing and scaling
See Also
Overview
Display and workflow